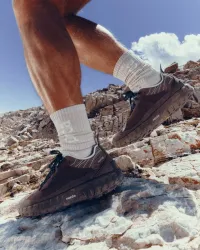
Why lower pressure is not always slower
On glass-smooth indoor velodrome surfaces, higher pressure can reduce tire deformation and roll efficiently. Canadian roads, rail trails and singletrack are another story. A tyre that is too hard bounces over roughness rather than tracking through it. That vibration costs energy, reduces grip and leaves you more fatigued by the end of a long ride.
Lowering pressure lets the tire conform to the surface. The contact patch becomes wider, traction improves and the bike stays calmer over broken pavement, roots and gravel. Go too low, however, and the tyre can bottom out against the rim, burp air from a tubeless setup, feel vague in corners or suffer a pinch flat with an inner tube.
Pressure is therefore a balance between speed, protection and handling. The right setting for a 60-minute criterium on smooth tarmac may be completely wrong for a four-hour mixed-surface ride through the Gatineau.
How to set tire pressure: start with the essentials
Begin with the information printed on the tire sidewall: its size and the manufacturer’s approved minimum and maximum pressure. The maximum is a safety ceiling, not a recommended starting point. Also check the maximum pressure stated by the rim manufacturer, especially with hookless road wheels, where limits can be lower.
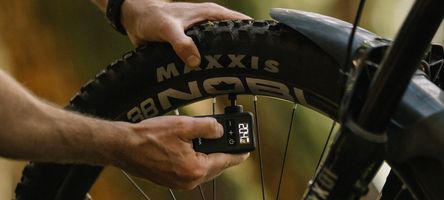
Use a reliable floor pump with a gauge, or better yet, compare your pump gauge with a known accurate digital gauge. Small differences matter more as tire volume decreases. An error of 5 psi is significant on a 28 mm road tire; it is less dramatic on a 2.4 inch mountain bike tire, but still enough to change cornering feel.
Set the rear tire slightly firmer than the front. More of your body weight sits over the rear wheel, usually around 55 to 60 percent on a road or gravel bike. A useful starting point is to add roughly 5 to 10 percent more pressure at the rear, then refine from there.
Choose a sensible starting pressure
There is no universal psi number, but these broad starting ranges work for an average-sized rider and bike. Treat them as a first ride setting, not a final prescription.
Heavier riders generally need more pressure, while lighter riders can run less. As a rough adjustment, change both tires by 2 to 3 psi on a road bike or 1 to 2 psi on gravel and mountain bikes before making another test ride. Do not make massive changes all at once, or you will struggle to identify what improved the ride.
Tire width matters just as much as rider weight. A larger air volume supports the same load at lower pressure. If you move from 28 mm to 32 mm road tires, expect to reduce pressure noticeably. Modern wide rims can also make a tire measure wider than its label, another reason pressure charts are starting points rather than rules.
Account for tubes, tubeless and inserts
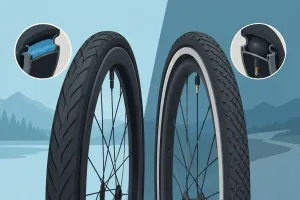
Tubeless tires can usually run lower pressure than tubes because there is no inner tube to pinch between the rim and tire during an impact. That is particularly useful on gravel and mountain bikes, where grip and rim protection are priorities. Tubeless is not a free pass to run extremely low pressures, though. Too little air can cause a tyre to burp at the bead during a hard corner.
With inner tubes, keep enough pressure to prevent pinch flats. If you regularly find the classic two-hole snakebite puncture after potholes or rocks, add a little air, inspect the rim tape and consider a larger-volume tire if your frame allows it.
Tire inserts add support and rim protection, especially for aggressive trail and enduro riding. They may let you reduce pressure slightly, but the result depends on the insert, tire casing and your riding style. Test methodically. An insert that improves stability in turns may allow a lower setting, while a very supportive casing may already provide the control you need.
Let terrain and conditions make the final call
For smooth summer pavement, ride near the upper end of your tested range. For cracked roads, chipseal and long endurance days, lower pressure often feels faster and is easier on your hands, back and shoulders. If the bike starts to feel harsh and chatters over every imperfection, it is usually overinflated.
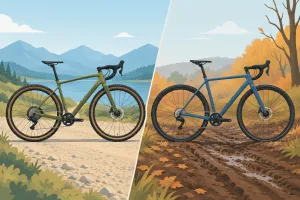
Gravel pressure depends heavily on surface. Firm packed gravel can take a few more psi than loose stone, washboard or rooty doubletrack. Lower pressure improves grip and reduces deflection on rough terrain, but add air before a route with sharp rocks, repeated square-edge hits or heavy bikepacking loads.
Mountain bikers should judge pressure by corner support as well as impact resistance. If the tire folds or feels delayed when you load it into a berm, add 1 psi. If your hands are taking a beating and the bike ricochets off roots, take 1 psi out. Front pressure is especially influential for confidence on wet roots, off-camber rocks and loose-over-hard corners.
Temperature also changes pressure. A tyre inflated in a warm workshop can lose several psi during a cold February fat-bike outing. Conversely, a bike left in direct summer sun or transported in a hot vehicle can gain pressure. Check before every important ride, not just at the start of the season.
Test pressure with a repeatable routine
Pick a familiar loop that includes the terrain you ride most often. Start at your chosen baseline, then pay attention to three things: traction in corners, harshness over bumps and signs of bottoming out. Make one small adjustment at a time and repeat the same section.
On a road bike, listen for sharp rim impacts and notice whether the bike skips across rough pavement. On gravel, look for instability under braking and a tendency to deflect off loose rocks. On a mountain bike, use a short descent with a few corners and compressions. The right pressure should feel planted without making the tire vague.