Start with a clean, dry base
Snow picks up contaminants. So do ski bags, wax benches, parking lots, and the last few meters of a trail covered in grit. After skiing, bring your skis indoors, wipe moisture from the bases and edges, and let them reach room temperature before putting them away. Avoid standing them directly against a heater. Fast heat can be hard on bindings, adhesives, and base material.
For routine cleaning, a soft fiber brush and a clean cloth are usually enough. Brush from tip to tail to remove loose dirt, then inspect the base under good light. A grey or chalky look is a common sign that the polyethylene is dry and ready for wax. Black streaks, sticky residue, or visible grime call for a more thorough clean before you add fresh wax.
Use a wax remover sparingly and only when it solves a real problem, such as stubborn dirt or contaminated old wax. Repeated solvent use can leave the base dry. For most skis, hot-scraping with a soft hydrocarbon wax is the more base-friendly reset: melt in a generous layer, let it cool only briefly, then scrape it while still warm to lift old wax and debris out of the structure.
Match waxing to your ski and snow
Wax serves two jobs. It protects the base from abrasion and oxidation, and it manages friction against snow. The right wax selection depends on temperature, humidity, snow crystal shape, and how long you will be skiing. A mid-winter blue hard wax may feel quick on cold transformed snow, while a softer warm wax can be the better choice on wet, coarse spring tracks.
For recreational training, do not overcomplicate the process. A temperature-appropriate hydrocarbon glide wax applied regularly will deliver most of the benefit. Racers can refine that starting point with harder base layers, powders, liquids, rilling, and specific overlays, but a poor application of an expensive race wax is still a poor application.
On waxable classic skis, keep glide wax out of the kick zone. Measure the zone according to your ski's camber and your weight, rather than guessing from an old wax mark. If glide wax contaminates the kick pocket, remove it completely before applying grip wax. On skin skis, protect the glide zones as normal, but keep glide wax, cleaners, and iron heat away from the skin insert unless the product is specifically designed for skins.
A dependable hot-wax routine
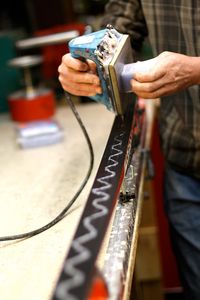
Set your iron to the wax manufacturer's recommended temperature. If the wax smokes, the iron is too hot. Drip wax along the glide zone, then move the iron continuously from tip to tail. The goal is a thin, even film, not pools of wax. Too much wax wastes product and makes scraping harder.
Let the ski cool fully to room temperature. Cooling lets the wax harden and settle into the base structure. Scrape tip to tail with a sharp plastic scraper until you are no longer removing visible wax ribbons. Then brush in the same direction. A stiff brass or bronze brush opens structure first, followed by nylon to clear remaining wax and polish the surface. A final soft brush can add a clean finish for race day.
If you only have time for one step after scraping, brush. A base covered in excess wax can feel noticeably slow because the structure is clogged. The brushing stage is where a freshly waxed ski begins to feel fast.
Read the base before damage gets bigger
Small scratches are normal, especially on early-season trails or low-snow routes. Most superficial marks disappear into the background after a few wax cycles. What deserves attention is a gouge deep enough to catch a fingernail, a white fuzzy-looking patch, a section where base material is missing, or any damage that reaches the ski core.
Minor scratches can often be filled with repair material, then levelled and waxed. This is careful work: an overheated repair can leave a hard, poorly bonded patch, and an uneven repair changes the way the ski runs. Core shots and damage near steel edges need professional assessment quickly. Water entering the core can turn a simple repair into a compromised ski.
Base flatness matters too. A ski can be clean and waxed but still feel unsettled or slow if the base is concave, convex, or has uneven edge material. That is where a precision stone grind earns its place. Grinding removes a small amount of base material to restore flatness and establish structure suited to likely snow conditions. It should not be treated as routine cosmetics. Ask for it when the ski has damage, inconsistent glide, a worn structure, or needs a purposeful reset before an important season.
At Euro-Sports, SkiSelector technology helps take the guesswork out of matching structure and tuning decisions to your skis and local conditions. For athletes with a race calendar, that specificity can matter far more than applying another layer of wax at home.
Do not ignore edges and sidewalls
Nordic skis do not use alpine-style metal edges, but their base edges and sidewalls still take abuse. Burrs along the base edge can catch snow and make the ski feel grabby, particularly in firm tracks. Lightly remove small burrs with a fine gummy stone or appropriate fine file, using minimal pressure. The objective is smoothness, not aggressive reshaping.
Be cautious around the sidewall. Excessive filing can reduce support at the edge of the base, and an uncontrolled file can damage the base itself. If you are unsure whether you are looking at a burr, a delamination, or a base defect, stop before turning a small issue into a repair job.
Store skis with next season in mind
At season's end, clean the bases and apply a generous storage wax. Do not scrape it off. That wax acts as a barrier against dry air, dust, and oxidation while the skis sit through the off-season. Store them in a cool, dry location away from direct sun, high heat, and sharp temperature swings.
Loosen straps enough that they do not compress the bases or distort the camber. Keep skis away from solvents, oils, and anything that might transfer onto the base.