FREE SHIPPING ON ORDERS $100 +

Euro-Sports | 2 hours ago

How to Clean Disc Brakes Without Contaminating Pads

A rotor that squeals through every stop after an Ottawa rain ride is not merely annoying. It is usually telling you that grime, chain lubricant, trail spray or cleaning residue has reached the braking surface. Knowing how to clean disc brakes properly restores consistent lever feel and modulation without creating the bigger problem: contaminated pads.


Disc brakes need very little routine attention, but they are intolerant of the wrong products. Treat the rotor and pads as a clean zone, separate from the drivetrain and frame-cleaning work. A few careful minutes after a wet, gritty ride can prevent noise, preserve pad life and keep your bike ready for the next training block.

When your disc brakes need cleaning


Clean the rotors when they look visibly dirty, after riding wet roads or muddy trails, or whenever braking becomes noisy, grabby or inconsistent. Road riders often see a thin film of road spray and salt residue in spring. Gravel and mountain bike riders collect finer dust, mud and organic debris that can work into the pad and rotor surface.


Noise alone does not always mean the brakes are dirty. A freshly installed rotor and pad set may need a proper bed-in procedure. A squeal can also come from a loose caliper bolt, worn pads, a rotor that is slightly out of true, or pads glazed by repeated hard braking. Cleaning is the sensible first step, but it is not a cure for every brake issue.


If braking power has dropped sharply, the lever pulls to the bar, or mineral oil or DOT fluid is visible near the caliper, stop riding until the system is inspected. Those symptoms call for workshop diagnosis, not more spray cleaner.


What to use to clean disc brakes


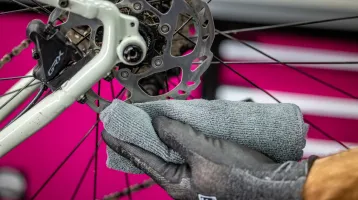
Use a dedicated bicycle disc-brake cleaner or high-purity isopropyl alcohol. Both evaporate cleanly and remove light oil and residue without leaving a lubricating film. Use clean, lint-free shop towels, ideally reserved for brake work, and wear nitrile gloves if you have them. Skin oils can transfer to a rotor more easily than most riders expect.


Keep these four items away from the brake track and pads:


-Chain lube, degreaser and aerosol protectants

-General-purpose cleaners that leave shine or fragrance additives

-Grease, assembly paste and anti-seize compounds

-Dirty rags previously used on the drivetrain


Do not use a pressure washer around hubs, calipers or bearings. It can force water and contaminants where they do not belong. Also avoid sanding a rotor unless there is a specific reason to address glazing or transfer material. Most routine cleaning needs solvent and a clean cloth, not abrasion.


How to clean disc brakes step by step


Start with the rotor. Spray brake cleaner onto a clean towel rather than directly onto the bike, especially if the product has a strong aerosol jet. Wipe both sides of the rotor from the centre outward, rotating the wheel as you go. Use a fresh section of towel for each pass until it no longer picks up dark residue.


Next, inspect the braking track. It should look even and clean, without wet-looking spots, heavy grooves, rainbow discoloration or a thick black film. Mild colour changes from heat are common on performance bikes and do not automatically mean replacement is required. Deep scoring, cracking or distortion does.


With the wheel removed, look into the caliper at the pads. The friction material should be firmly bonded to the backing plate and wear should be reasonably even. Most pads have a minimum thickness specified by the manufacturer, but as a practical rule, replace pads before the friction material is close to 1 mm. Do not touch the pad face with bare fingers.


If the pads look clean and have adequate material, reinstall the wheel, centre it fully in the dropouts or axle mounts, and tighten the axle to the bike manufacturer’s specification. Spin the wheel. A light intermittent tick can be a rotor that needs truing, while constant rubbing may mean the caliper needs alignment.


Finish by pumping the brake lever several times until it feels firm. Then test braking at walking speed in a safe area before heading into traffic, onto the parkway or down a technical descent.


Cleaning pads after contamination


Pad contamination is different from a dusty rotor. If lubricant, hydraulic fluid, polish or a greasy cleaner has reached the pad, the realistic fix is often replacement. Pads are porous, and a solvent wipe may remove surface residue while leaving contamination beneath it. The noise often returns as soon as the pads heat up.


For light contamination, some experienced mechanics lightly sand the pad surface on a flat, clean abrasive sheet, clean the rotor thoroughly, then bed the pads in again. This can work when the issue is limited to surface glazing or minor transfer material. It is less dependable when the pads smell oily, appear wet, or have been exposed to chain lube or brake fluid. On a bike used for racing, long descents or daily commuting, new pads are the safer call.


If you replace pads, clean the rotor before fitting them. New pads against a contaminated rotor simply transfer the problem into fresh material.


Bed brakes in after cleaning or new pads


A thorough clean, new rotor or new pads may require bedding in. This builds an even transfer layer of pad material on the rotor, which gives the controlled, powerful braking modern hydraulic systems are known for.


In a safe, flat area, accelerate to a moderate speed and apply one brake firmly enough to slow down decisively without skidding or coming to a complete stop. Repeat this around 10 to 15 times per brake, allowing a little speed to build between stops. Follow with several stronger stops from a higher speed. Avoid holding the brake on while stationary with hot pads clamped to the rotor, as that can leave uneven material deposits.


The exact process varies slightly by pad compound and manufacturer, but the objective is consistent: progressive heat cycles and even pad transfer. Once bedded in, braking should feel quieter, more predictable and more powerful.


When to bring the bike to a shop


A rotor wipe will not solve a bent rotor, sticking pistons, loose hardware, damaged hose, leaking caliper or uneven pad wear caused by alignment issues. If the rotor rubs after a wheel is correctly installed, if braking pulses at the lever, or if you are uncertain about pad thickness, have the system checked before your next hard ride.


At Euro-Sports, our shop team can inspect pad wear, rotor thickness, caliper alignment and hydraulic performance as part of getting a road, gravel or mountain bike back to race-ready condition.

All of our staff are active cyclists, xc-skiers, and runners - so we know how important it is to have equipment properly tailored to an athlete's specific needs.


NOTE! No appointments needed for ski wax service - just bring your skis in and we will go from there!


Most repairs are completed within 48 hours of drop-off. Give us a call at 613-422-5616 to confirm turnaround time for your specific service.

Euro-Sports

More Posts

Steel Versus Titanium Frames: Which Fits You?Steel Versus Titanium Frames: Which Fits You?
Steel Versus Titanium Frames: Which Fits You?

A cold April road outside Ottawa tells you more about a frame than a showroom lift ever will. Broken pavement, grit on the shoulders, a crosswind and four hours to ride: this is where steel versus titanium frames becomes a real choice, not just a material debate. Both can produce a fast, beautifully finished custom bike that stays relevant for years. The better option depends on the way you ride, the fit you need and what you expect your bike to endure.


For riders considering a custom road, gravel or all-road machine, the question is rarely, “Which material is best?” It is, “Which material will make me want to ride this bike in five years?” Steel and titanium answer that question differently.

Gravel Versus Cyclocross Bikes ComparedGravel Versus Cyclocross Bikes Compared
Gravel Versus Cyclocross Bikes Compared

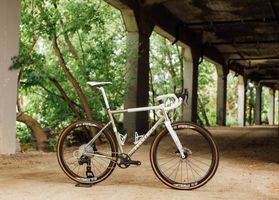
A fast drop-bar bike with room for wider tires can look like either choice from across the parking lot. That is why the gravel versus cyclocross bikes question causes so much uncertainty for riders shopping for one capable machine. The overlap is real, but the priorities are different: one is built to stay composed for hours over changing surfaces; the other is built to attack a hard, technical race for about an hour.


For Ottawa riders, that distinction matters. A Saturday on the Prescott-Russell Trail, the rail trail toward Carleton Place, or a long backroad route in the Gatineau can involve washboard gravel, pavement, mud, sand, and plenty of distance. A cyclocross course can pack off-cambers, barriers, steep run-ups, grass, ruts, and repeated accelerations into a compact circuit. Pick the bike for the riding you actually do most often, not just the event that sounds exciting in January.

How to Set Tire Pressure for Faster Bike RidesHow to Set Tire Pressure for Faster Bike Rides
How to Set Tire Pressure for Faster Bike Rides

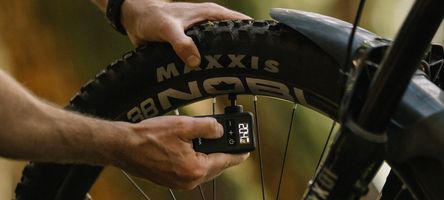
A 28 mm road tire at 95 psi can feel quick on a perfectly smooth road and punishingly slow on Ottawa pavement. The same applies off-road: a gravel tire inflated for hardpack can skip across loose corners, while a mountain bike tire set too soft can fold under load. Learning how to set tire pressure is one of the fastest, least expensive ways to improve comfort, control and rolling speed.


The target is not the highest pressure your tyre allows. It is the lowest pressure that gives dependable support, avoids rim strikes or tire squirm, and suits the surface you are actually riding. That sweet spot changes with rider weight, bike weight, tire volume, casing, terrain and conditions.

Best Cycling Bib Shorts for Comfort and SpeedBest Cycling Bib Shorts for Comfort and Speed
Best Cycling Bib Shorts for Comfort and Speed

The best cycling bib shorts are the pair you stop noticing halfway through a hard ride. That sounds simple, but it is a demanding brief: the fabric must stay put, the straps must disappear, and the chamois must support you without creating heat, pressure, or bulk. For Canadian riders moving between indoor training, rough spring pavement, long gravel days, and fast group rides, shorts are not an accessory. They are contact-point equipment.


A premium pair costs more because the details are harder to get right. Better shorts use shaped multi-panel construction, high-recovery fabric, carefully placed seams, and a chamois designed for a particular riding position. The right pair will make a bigger difference to comfort than chasing another few grams from your bike.

Tubeless Versus Clincher Tires for Your RideTubeless Versus Clincher Tires for Your Ride
Tubeless Versus Clincher Tires for Your Ride

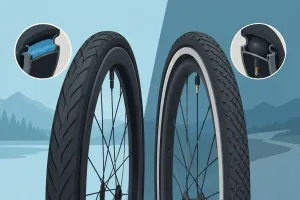
A pothole on an Ottawa spring road, loose limestone on the Prescott-Russell Trail, or a rooty Gatineau singletrack can make tire choice feel very real, very quickly. The tubeless versus clincher tires decision is not about following a trend. It is about choosing the system that gives you the right balance of speed, comfort, reliability, and serviceability for the rides you actually do.


For many performance riders, tubeless is now the default for gravel and mountain biking, and increasingly compelling on the road. Traditional clinchers with inner tubes still earn their place, especially for riders who value simplicity, travel frequently, or want the fastest possible roadside repair. The better option depends on your tire width, rim compatibility, typical terrain, and tolerance for setup work.

Best Hydration Mixes Cyclists Choose for Long RidesBest Hydration Mixes Cyclists Choose for Long Rides
Best Hydration Mixes Cyclists Choose for Long Rides

A bottle that still feels full after an hour is often telling you something: the mix is too sweet, too strong, or simply wrong for the effort. The best hydration mixes cyclists choose are not necessarily the ones with the biggest marketing claims. They are the ones you can drink consistently, digest comfortably, and use to keep power steady when the ride gets long.


For Ottawa road loops, humid summer training, dusty gravel events, and indoor sessions where sweat loss is easy to underestimate, hydration should be planned as carefully as tire pressure or pacing. A good mix gives you fluid, sodium, and, when required, carbohydrate in a concentration your body can actually absorb while riding.

How to Size Cycling Shoes for a Better RideHow to Size Cycling Shoes for a Better Ride
How to Size Cycling Shoes for a Better Ride

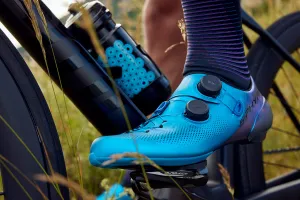
A cycling shoe that feels fine while standing in a shop can become a problem 40 kilometres into a hard ride. Hot spots, numb toes and heel lift waste energy and distract from the work in front of you. Knowing how to size cycling shoes is less about finding a number on a box and more about matching your foot shape, riding discipline and closure system to the demands of your ride.


For road training, gravel events, mountain bike laps or a winter block on the trainer, the goal is the same: secure foot retention without pressure. A properly fitted cycling shoe turns your foot into a stable platform over the pedal, helping you apply power cleanly while keeping comfort intact for hours.

Ski Waxing for Faster Nordic Ski Days in OttawaSki Waxing for Faster Nordic Ski Days in Ottawa
Ski Waxing for Faster Nordic Ski Days in Ottawa

A bluebird morning at Gatineau Park can start at -15 C, warm quickly in the sun, and leave the trail feeling completely different by noon. That is why ski waxing is not just a race-day ritual. It is the small piece of preparation that determines whether your skis feel free and fast, or slow enough to turn a great training session into a grind.


For Canadian Nordic skiers, waxing is about matching your ski base to the snow in front of you. Get it right and your skis carry speed, track cleanly, and preserve energy over long kilometres. Get it wrong and even excellent skis can feel like they are dragging a snowplow.

<p>Carbon Wheel Durability for Canadian Riding</p><p>Carbon Wheel Durability for Canadian Riding</p>

Carbon Wheel Durability for Canadian Riding

A sharp-edged pothole after a thaw, a square hit on a rocky descent, or a long wet brake down a Gatineau grade will test carbon wheel durability far more honestly than a product weight claim. Modern carbon wheels are exceptionally strong for their mass, but they are engineered systems, not indestructible race props. The right wheel, tire pressure, build quality and maintenance routine make the difference between years of fast riding and an expensive interruption to your season.


For road, gravel, mountain and cyclocross riders, carbon rims can be a dependable long-term upgrade. They hold their shape well, resist corrosion, and allow designers to tune stiffness, aerodynamics and impact resistance with remarkable precision. The trade-off is that damage is not always obvious, and a carbon rim requires a more disciplined inspection after a meaningful hit.