When your disc brakes need cleaning
Clean the rotors when they look visibly dirty, after riding wet roads or muddy trails, or whenever braking becomes noisy, grabby or inconsistent. Road riders often see a thin film of road spray and salt residue in spring. Gravel and mountain bike riders collect finer dust, mud and organic debris that can work into the pad and rotor surface.
Noise alone does not always mean the brakes are dirty. A freshly installed rotor and pad set may need a proper bed-in procedure. A squeal can also come from a loose caliper bolt, worn pads, a rotor that is slightly out of true, or pads glazed by repeated hard braking. Cleaning is the sensible first step, but it is not a cure for every brake issue.
If braking power has dropped sharply, the lever pulls to the bar, or mineral oil or DOT fluid is visible near the caliper, stop riding until the system is inspected. Those symptoms call for workshop diagnosis, not more spray cleaner.
What to use to clean disc brakes
Use a dedicated bicycle disc-brake cleaner or high-purity isopropyl alcohol. Both evaporate cleanly and remove light oil and residue without leaving a lubricating film. Use clean, lint-free shop towels, ideally reserved for brake work, and wear nitrile gloves if you have them. Skin oils can transfer to a rotor more easily than most riders expect.
Keep these four items away from the brake track and pads:
-Chain lube, degreaser and aerosol protectants
-General-purpose cleaners that leave shine or fragrance additives
-Grease, assembly paste and anti-seize compounds
-Dirty rags previously used on the drivetrain
Do not use a pressure washer around hubs, calipers or bearings. It can force water and contaminants where they do not belong. Also avoid sanding a rotor unless there is a specific reason to address glazing or transfer material. Most routine cleaning needs solvent and a clean cloth, not abrasion.
How to clean disc brakes step by step
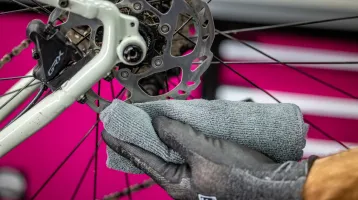
Start with the rotor. Spray brake cleaner onto a clean towel rather than directly onto the bike, especially if the product has a strong aerosol jet. Wipe both sides of the rotor from the centre outward, rotating the wheel as you go. Use a fresh section of towel for each pass until it no longer picks up dark residue.
Next, inspect the braking track. It should look even and clean, without wet-looking spots, heavy grooves, rainbow discoloration or a thick black film. Mild colour changes from heat are common on performance bikes and do not automatically mean replacement is required. Deep scoring, cracking or distortion does.
With the wheel removed, look into the caliper at the pads. The friction material should be firmly bonded to the backing plate and wear should be reasonably even. Most pads have a minimum thickness specified by the manufacturer, but as a practical rule, replace pads before the friction material is close to 1 mm. Do not touch the pad face with bare fingers.
If the pads look clean and have adequate material, reinstall the wheel, centre it fully in the dropouts or axle mounts, and tighten the axle to the bike manufacturer’s specification. Spin the wheel. A light intermittent tick can be a rotor that needs truing, while constant rubbing may mean the caliper needs alignment.
Finish by pumping the brake lever several times until it feels firm. Then test braking at walking speed in a safe area before heading into traffic, onto the parkway or down a technical descent.
Cleaning pads after contamination
Pad contamination is different from a dusty rotor. If lubricant, hydraulic fluid, polish or a greasy cleaner has reached the pad, the realistic fix is often replacement. Pads are porous, and a solvent wipe may remove surface residue while leaving contamination beneath it. The noise often returns as soon as the pads heat up.
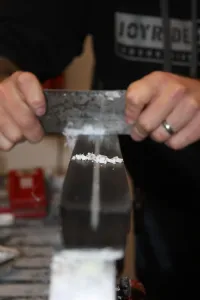
For light contamination, some experienced mechanics lightly sand the pad surface on a flat, clean abrasive sheet, clean the rotor thoroughly, then bed the pads in again. This can work when the issue is limited to surface glazing or minor transfer material. It is less dependable when the pads smell oily, appear wet, or have been exposed to chain lube or brake fluid. On a bike used for racing, long descents or daily commuting, new pads are the safer call.
If you replace pads, clean the rotor before fitting them. New pads against a contaminated rotor simply transfer the problem into fresh material.
Bed brakes in after cleaning or new pads
A thorough clean, new rotor or new pads may require bedding in. This builds an even transfer layer of pad material on the rotor, which gives the controlled, powerful braking modern hydraulic systems are known for.
In a safe, flat area, accelerate to a moderate speed and apply one brake firmly enough to slow down decisively without skidding or coming to a complete stop. Repeat this around 10 to 15 times per brake, allowing a little speed to build between stops. Follow with several stronger stops from a higher speed. Avoid holding the brake on while stationary with hot pads clamped to the rotor, as that can leave uneven material deposits.
The exact process varies slightly by pad compound and manufacturer, but the objective is consistent: progressive heat cycles and even pad transfer. Once bedded in, braking should feel quieter, more predictable and more powerful.
When to bring the bike to a shop
A rotor wipe will not solve a bent rotor, sticking pistons, loose hardware, damaged hose, leaking caliper or uneven pad wear caused by alignment issues. If the rotor rubs after a wheel is correctly installed, if braking pulses at the lever, or if you are uncertain about pad thickness, have the system checked before your next hard ride.
At Euro-Sports, our shop team can inspect pad wear, rotor thickness, caliper alignment and hydraulic performance as part of getting a road, gravel or mountain bike back to race-ready condition.