FREE SHIPPING ON ORDERS $100 +

Euro-Sports | 1 hour ago

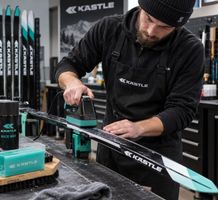
Ski Base Care Guide for Faster Nordic Skis

A Nordic ski can have excellent camber, a well-chosen grind, and the right flex for your weight, yet still feel slow if its base is dry, dirty, or damaged. This ski base care guide focuses on the work that protects your glide zones between Ottawa freeze-thaw cycles, abrasive hardpack, road grit near trail access points, and long kilometers of training.


Base care is not about chasing perfection after every outing. It is about recognizing what the ski needs, applying the right level of maintenance, and avoiding the shortcuts that create more work later. A few deliberate habits will keep your skis faster, more predictable, and ready when fresh tracks appear.

Start with a clean, dry base


Snow picks up contaminants. So do ski bags, wax benches, parking lots, and the last few meters of a trail covered in grit. After skiing, bring your skis indoors, wipe moisture from the bases and edges, and let them reach room temperature before putting them away. Avoid standing them directly against a heater. Fast heat can be hard on bindings, adhesives, and base material.


For routine cleaning, a soft fiber brush and a clean cloth are usually enough. Brush from tip to tail to remove loose dirt, then inspect the base under good light. A grey or chalky look is a common sign that the polyethylene is dry and ready for wax. Black streaks, sticky residue, or visible grime call for a more thorough clean before you add fresh wax.


Use a wax remover sparingly and only when it solves a real problem, such as stubborn dirt or contaminated old wax. Repeated solvent use can leave the base dry. For most skis, hot-scraping with a soft hydrocarbon wax is the more base-friendly reset: melt in a generous layer, let it cool only briefly, then scrape it while still warm to lift old wax and debris out of the structure.


Match waxing to your ski and snow


Wax serves two jobs. It protects the base from abrasion and oxidation, and it manages friction against snow. The right wax selection depends on temperature, humidity, snow crystal shape, and how long you will be skiing. A mid-winter blue hard wax may feel quick on cold transformed snow, while a softer warm wax can be the better choice on wet, coarse spring tracks.


For recreational training, do not overcomplicate the process. A temperature-appropriate hydrocarbon glide wax applied regularly will deliver most of the benefit. Racers can refine that starting point with harder base layers, powders, liquids, rilling, and specific overlays, but a poor application of an expensive race wax is still a poor application.


On waxable classic skis, keep glide wax out of the kick zone. Measure the zone according to your ski's camber and your weight, rather than guessing from an old wax mark. If glide wax contaminates the kick pocket, remove it completely before applying grip wax. On skin skis, protect the glide zones as normal, but keep glide wax, cleaners, and iron heat away from the skin insert unless the product is specifically designed for skins.


A dependable hot-wax routine


Set your iron to the wax manufacturer's recommended temperature. If the wax smokes, the iron is too hot. Drip wax along the glide zone, then move the iron continuously from tip to tail. The goal is a thin, even film, not pools of wax. Too much wax wastes product and makes scraping harder.


Let the ski cool fully to room temperature. Cooling lets the wax harden and settle into the base structure. Scrape tip to tail with a sharp plastic scraper until you are no longer removing visible wax ribbons. Then brush in the same direction. A stiff brass or bronze brush opens structure first, followed by nylon to clear remaining wax and polish the surface. A final soft brush can add a clean finish for race day.


If you only have time for one step after scraping, brush. A base covered in excess wax can feel noticeably slow because the structure is clogged. The brushing stage is where a freshly waxed ski begins to feel fast.


Read the base before damage gets bigger


Small scratches are normal, especially on early-season trails or low-snow routes. Most superficial marks disappear into the background after a few wax cycles. What deserves attention is a gouge deep enough to catch a fingernail, a white fuzzy-looking patch, a section where base material is missing, or any damage that reaches the ski core.


Minor scratches can often be filled with repair material, then levelled and waxed. This is careful work: an overheated repair can leave a hard, poorly bonded patch, and an uneven repair changes the way the ski runs. Core shots and damage near steel edges need professional assessment quickly. Water entering the core can turn a simple repair into a compromised ski.


Base flatness matters too. A ski can be clean and waxed but still feel unsettled or slow if the base is concave, convex, or has uneven edge material. That is where a precision stone grind earns its place. Grinding removes a small amount of base material to restore flatness and establish structure suited to likely snow conditions. It should not be treated as routine cosmetics. Ask for it when the ski has damage, inconsistent glide, a worn structure, or needs a purposeful reset before an important season.


At Euro-Sports, SkiSelector technology helps take the guesswork out of matching structure and tuning decisions to your skis and local conditions. For athletes with a race calendar, that specificity can matter far more than applying another layer of wax at home.


Do not ignore edges and sidewalls


Nordic skis do not use alpine-style metal edges, but their base edges and sidewalls still take abuse. Burrs along the base edge can catch snow and make the ski feel grabby, particularly in firm tracks. Lightly remove small burrs with a fine gummy stone or appropriate fine file, using minimal pressure. The objective is smoothness, not aggressive reshaping.


Be cautious around the sidewall. Excessive filing can reduce support at the edge of the base, and an uncontrolled file can damage the base itself. If you are unsure whether you are looking at a burr, a delamination, or a base defect, stop before turning a small issue into a repair job.


Store skis with next season in mind


At season's end, clean the bases and apply a generous storage wax. Do not scrape it off. That wax acts as a barrier against dry air, dust, and oxidation while the skis sit through the off-season. Store them in a cool, dry location away from direct sun, high heat, and sharp temperature swings.


Loosen straps enough that they do not compress the bases or distort the camber. Keep skis away from solvents, oils, and anything that might transfer onto the base.

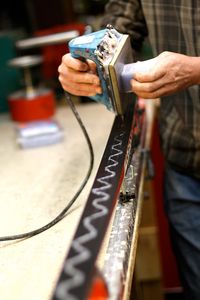
All of our staff are active cyclists, xc-skiers, and runners - so we know how important it is to have equipment properly tailored to an athlete's specific needs.


NOTE! No appointments needed for ski wax service - just bring your skis in and we will go from there!


Most repairs are completed within 48 hours of drop-off. Give us a call at 613-422-5616 to confirm turnaround time for your specific service.

Euro-Sports

More Posts

Ski Tuning Performance Starts at the BaseSki Tuning Performance Starts at the Base
Ski Tuning Performance Starts at the Base

A ski can feel fast in the shop and stubborn on the trail 20 minutes later. That gap is usually not about fitness or an expensive new ski. It is about ski tuning performance: how well the base structure, wax selection, base condition, and ski setup match the snow beneath you.


For Ottawa-area Nordic skiers, conditions can change from dry, abrasive cold to humid transformed snow in a matter of days. A tune that works beautifully at -12 C may feel slow at -2 C, especially after fresh snow has been skied in. The right preparation gives you a ski that releases cleanly, carries speed through flats, and remains predictable when the course gets technical.

Nordic Ski Boot Guide: Find Your Best FitNordic Ski Boot Guide: Find Your Best Fit
Nordic Ski Boot Guide: Find Your Best Fit

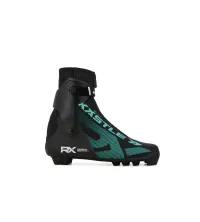
A Nordic ski boot can make a fast ski feel vague, a perfect wax day feel uncomfortable, and a long Gatineau or Kichi Sibi outing end early. It is the point where your body meets the ski, so fit and compatibility matter as much as ski length, camber, or base structure. This Nordic ski boot guide will help you choose a boot that supports the way you actually ski - whether that means steady classic kilometers, skate intervals, loppet racing, or a mix of Ottawa winter terrain.

Is a Titanium Road Bike Worth It for Canadian Riders?Is a Titanium Road Bike Worth It for Canadian Riders?
Is a Titanium Road Bike Worth It for Canadian Riders?

A rough patch of pavement on the Ottawa River Parkway can tell you more about a frame material than a showroom test ride. A titanium road bike has a distinctive way of taking the edge off broken asphalt while still feeling direct when you stand on the pedals. For riders putting in long training blocks, chasing fondos, commuting through shoulder seasons, or building one road bike to keep for decades, that balance is the point.


Titanium is not automatically the fastest choice, the lightest choice, or the least expensive choice. What it offers is a rare combination of fatigue resistance, ride quality, corrosion resistance, and custom-build potential. If those qualities match how and where you ride, it can be one of the most satisfying investments in cycling.

Classic Versus Skate Skiing for Ottawa SkiersClassic Versus Skate Skiing for Ottawa Skiers
Classic Versus Skate Skiing for Ottawa Skiers

The first few meters usually settle the classic versus skate skiing question. Step into a groomed classic track, settle your weight over one ski, and the movement can feel familiar almost immediately. Push out onto a wide, firm skate lane, however, and the sport becomes more dynamic: balance, edge grip, timing, and a stronger aerobic engine all matter at once.


For Ottawa-area skiers, both techniques make sense. We have reliable Nordic communities, great trail networks, cold spells that reward good wax choices, and variable freeze-thaw conditions that can expose a poor ski setup quickly. The right choice is less about which style is "better" and more about where you ski, what kind of workout you want, and how much time you can give to learning the movement.

Custom Bicycle Geometry Guide for Better FitCustom Bicycle Geometry Guide for Better Fit
Custom Bicycle Geometry Guide for Better Fit

A frame can be beautifully built, fitted with premium wheels and perfectly tuned shifting, yet still feel wrong from the first hard climb. That is where a custom bicycle geometry guide earns its place. Custom geometry is not about making every measurement different for the sake of it. It is about building a bike around the way you move, the terrain you ride, the events you target and the handling you expect when the pace rises.


For Canadian riders, that may mean a fast road position that remains comfortable through a long Gatineau loop, a gravel bike stable enough for washboard roads and loaded overnighters, or a mountain bike that keeps you centered on steep, technical descents. The right numbers create a bike you can ride harder, longer and with more confidence.

How to Clean Disc Brakes Without Contaminating PadsHow to Clean Disc Brakes Without Contaminating Pads
How to Clean Disc Brakes Without Contaminating Pads

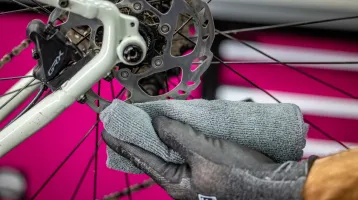
A rotor that squeals through every stop after an Ottawa rain ride is not merely annoying. It is usually telling you that grime, chain lubricant, trail spray or cleaning residue has reached the braking surface. Knowing how to clean disc brakes properly restores consistent lever feel and modulation without creating the bigger problem: contaminated pads.


Disc brakes need very little routine attention, but they are intolerant of the wrong products. Treat the rotor and pads as a clean zone, separate from the drivetrain and frame-cleaning work. A few careful minutes after a wet, gritty ride can prevent noise, preserve pad life and keep your bike ready for the next training block.

Steel Versus Titanium Frames: Which Fits You?Steel Versus Titanium Frames: Which Fits You?
Steel Versus Titanium Frames: Which Fits You?

A cold April road outside Ottawa tells you more about a frame than a showroom lift ever will. Broken pavement, grit on the shoulders, a crosswind and four hours to ride: this is where steel versus titanium frames becomes a real choice, not just a material debate. Both can produce a fast, beautifully finished custom bike that stays relevant for years. The better option depends on the way you ride, the fit you need and what you expect your bike to endure.


For riders considering a custom road, gravel or all-road machine, the question is rarely, “Which material is best?” It is, “Which material will make me want to ride this bike in five years?” Steel and titanium answer that question differently.

Gravel Versus Cyclocross Bikes ComparedGravel Versus Cyclocross Bikes Compared
Gravel Versus Cyclocross Bikes Compared

A fast drop-bar bike with room for wider tires can look like either choice from across the parking lot. That is why the gravel versus cyclocross bikes question causes so much uncertainty for riders shopping for one capable machine. The overlap is real, but the priorities are different: one is built to stay composed for hours over changing surfaces; the other is built to attack a hard, technical race for about an hour.


For Ottawa riders, that distinction matters. A Saturday on the Prescott-Russell Trail, the rail trail toward Carleton Place, or a long backroad route in the Gatineau can involve washboard gravel, pavement, mud, sand, and plenty of distance. A cyclocross course can pack off-cambers, barriers, steep run-ups, grass, ruts, and repeated accelerations into a compact circuit. Pick the bike for the riding you actually do most often, not just the event that sounds exciting in January.

How to Set Tire Pressure for Faster Bike RidesHow to Set Tire Pressure for Faster Bike Rides
How to Set Tire Pressure for Faster Bike Rides

A 28 mm road tire at 95 psi can feel quick on a perfectly smooth road and punishingly slow on Ottawa pavement. The same applies off-road: a gravel tire inflated for hardpack can skip across loose corners, while a mountain bike tire set too soft can fold under load. Learning how to set tire pressure is one of the fastest, least expensive ways to improve comfort, control and rolling speed.


The target is not the highest pressure your tyre allows. It is the lowest pressure that gives dependable support, avoids rim strikes or tire squirm, and suits the surface you are actually riding. That sweet spot changes with rider weight, bike weight, tire volume, casing, terrain and conditions.